

Mitten Doodle
Here is your pattern:
Mitten Doodle Pattern pdf– Includes: photo, supply list, instructions. Use the full sized scan as your linework.
Today’s project incorporates both video and pdf files. Work at your own pace and
The lessons are divided into smaller segments so you can easily find topics. I recommend that you watch the lessons in numerical order so you can see the project from start to finish. Of course, you can always go back and watch them over as many times as you need to in order to grasp the skill being demonstrated. The time it will take to watch each video varies from lesson to lesson, and is shown in parenthesis () after each video link.
It is recommended that you let the video load completely in the browser window before you attempt to play it. Be patient, this may take a few minutes. It will depend on the speed of your computer and the speed of your internet connection.
NOTE: To view each video, click on the links below. The video will open in a new window. Close the window to return to this page.
Video 1: (3:10)
Video 2: (5:11)
Video 3: (6:44)
Doodling uses repetitive patterns and shapes to create and decorate. Pens, brushes and stylus are our tools of choice. Painters normally add linework to their paintings but there is a current trend to make the patterns the main attraction.
Today’s lesson uses lines and shapes to create design on mitten ornaments. Lines can be straight, slanted, curved, wavy, arched, swirled and curled. Repetition of lines and shapes create a pattern and a rhythm. You can create interest my manipulating the use and style of the line. Vary the distance between the lines. You can also vary the weight of the line by using different sizes of pens. Patterns can be created in both horizontal and vertical directions.
Repetitive patterning is fun and addictive. Very addictive. The problem is that It is often hard to stop.
Perfection is not necessary to create a great design. Just relax and have fun with it.
Review the repetitive patterns and information included in this pdf.
Doodling and repetitive patterns – Day 1
1. Create your own notebook to create patterns. You can use just lined paper or draw horizontal lines with a pen or pencil. You can use a ballpoint pen or markers. You can also practice with a pencil.
2. Practice combining lines to create your own patterns. Do 20 combinations of your own.
3. Review the pattern, You can start by tracing the shape on a paper. Practice your pattern combinations using various pens. Find the combinations you like the best. You can then find a shape or piece of wood to practice with. Then you will be off to the races.
Here is the progression of the project:
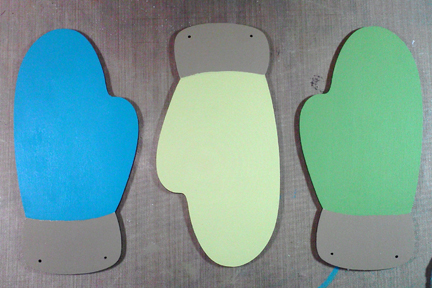
4. Base ornaments with solid color.

5. Add stripes. I used them for both backgrounds and as areas to decorate on.

6. Add snowflake combinations and shade stripes and around the edge.

7. Pounce the cuffs with a stencil brush and Snow White. Shade the cuffs when they are dry.

8. Add your own line patterns and fill the stripes.
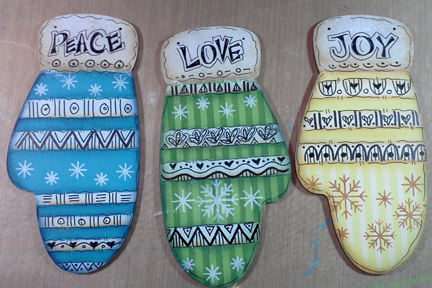
9. Finish by adding lettering. You can do this with a pen or pick a stencil with your favorite word or saying. Learn to do simple lettering and you can do personalization of your ornaments. We will discuss lettering in greater detail in future lessons. Crafters love this!
Repeat this idea with any kind shape. You can create mini banners and other fun ornaments using this concept.
If you want to find some great doodling looks, check out my Pinterest Doodling Board. I have collected lots of cool looks.
Start looking around and see patterns in woodwork, buildings and lots of objects you will find in your environment. You will never look at things in the same way again.
*Ornaments are great for adding this type of doodling but jewelry pieces work well too.
Now start creating. Remember you can work on paper first and get the system down. Then order some surfaces and go to town.
Today’s Question:
What other objects would work well to decorate in this manner?
